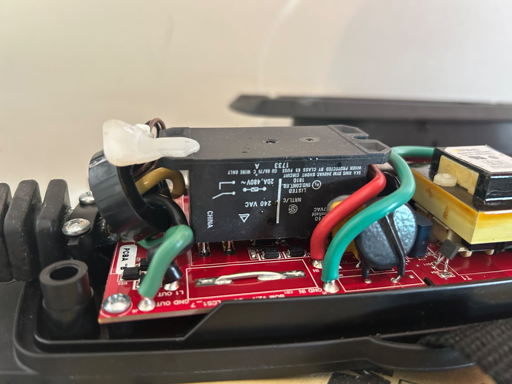
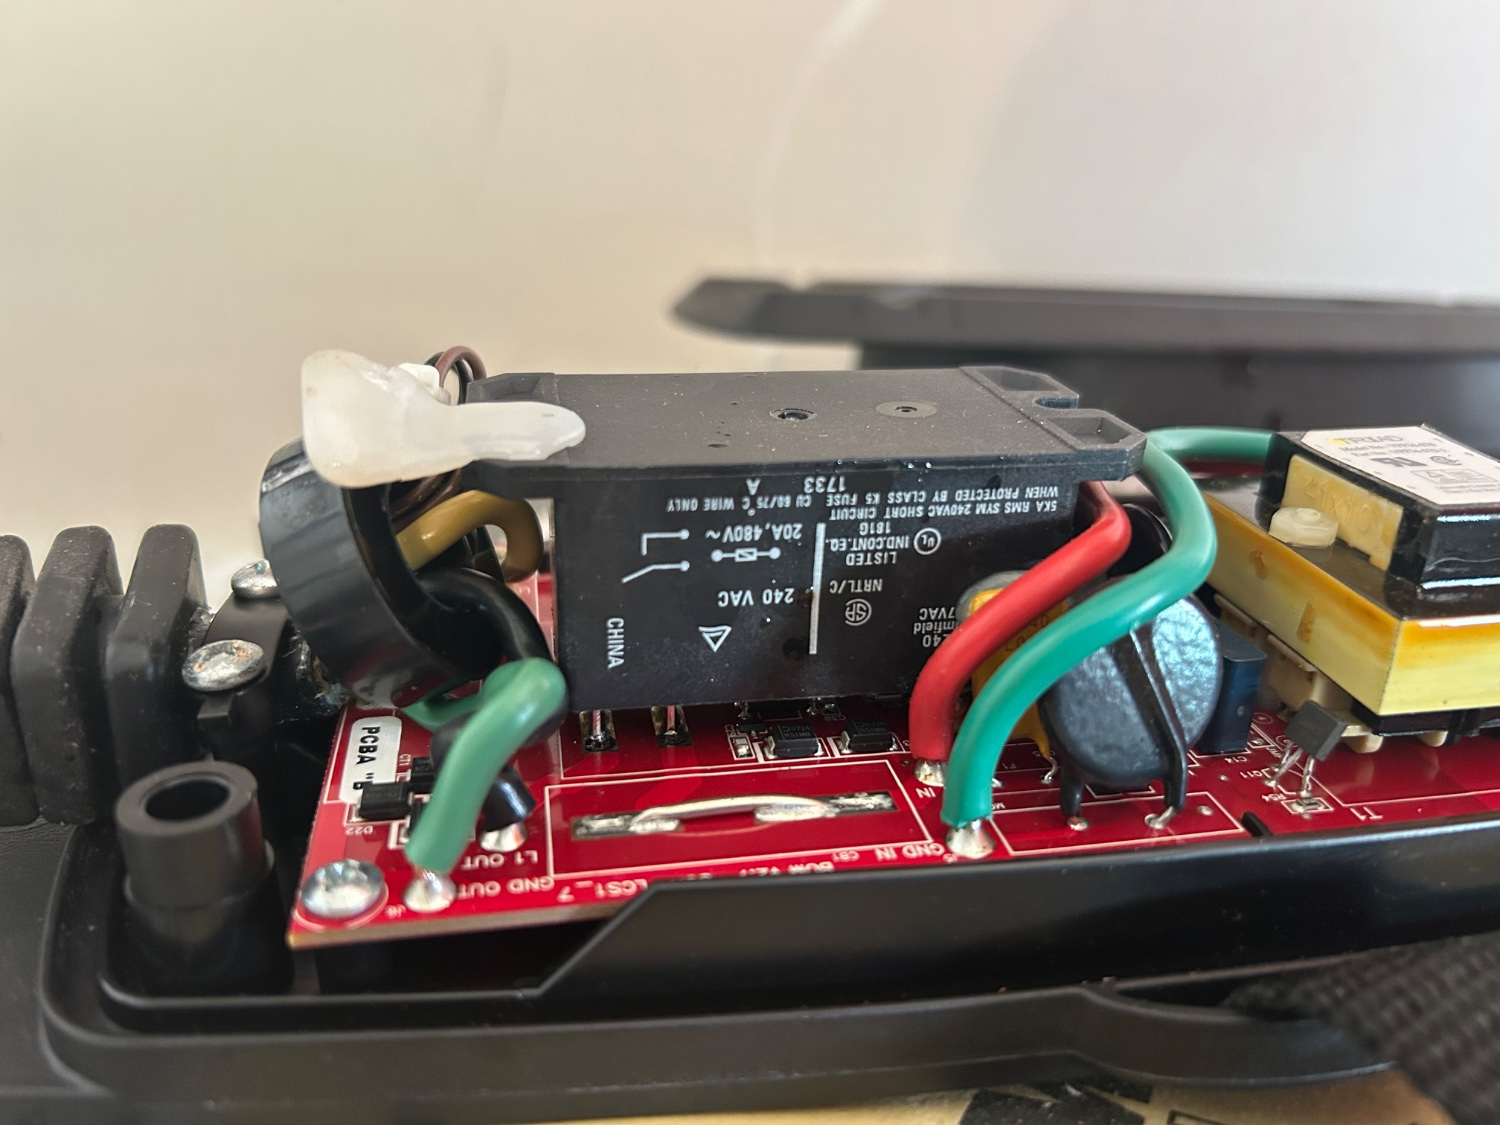
I repaired my evse by replacing the faulty contactor
-
cross-posted from: https://lemmus.org/post/26133267
Be careful if you attempt this, you’re working with 240v electronics.
A few months ago I noticed my EVSE started buzzing really loudly every time I would plug in to charge. A few days after that it stopped charging entirely. It’s a Clippercreek, that is 8+ years old, I can’t complain too much but I can’t exactly afford $300-ish for a replacement, so I decided to try to replace the relay myself.
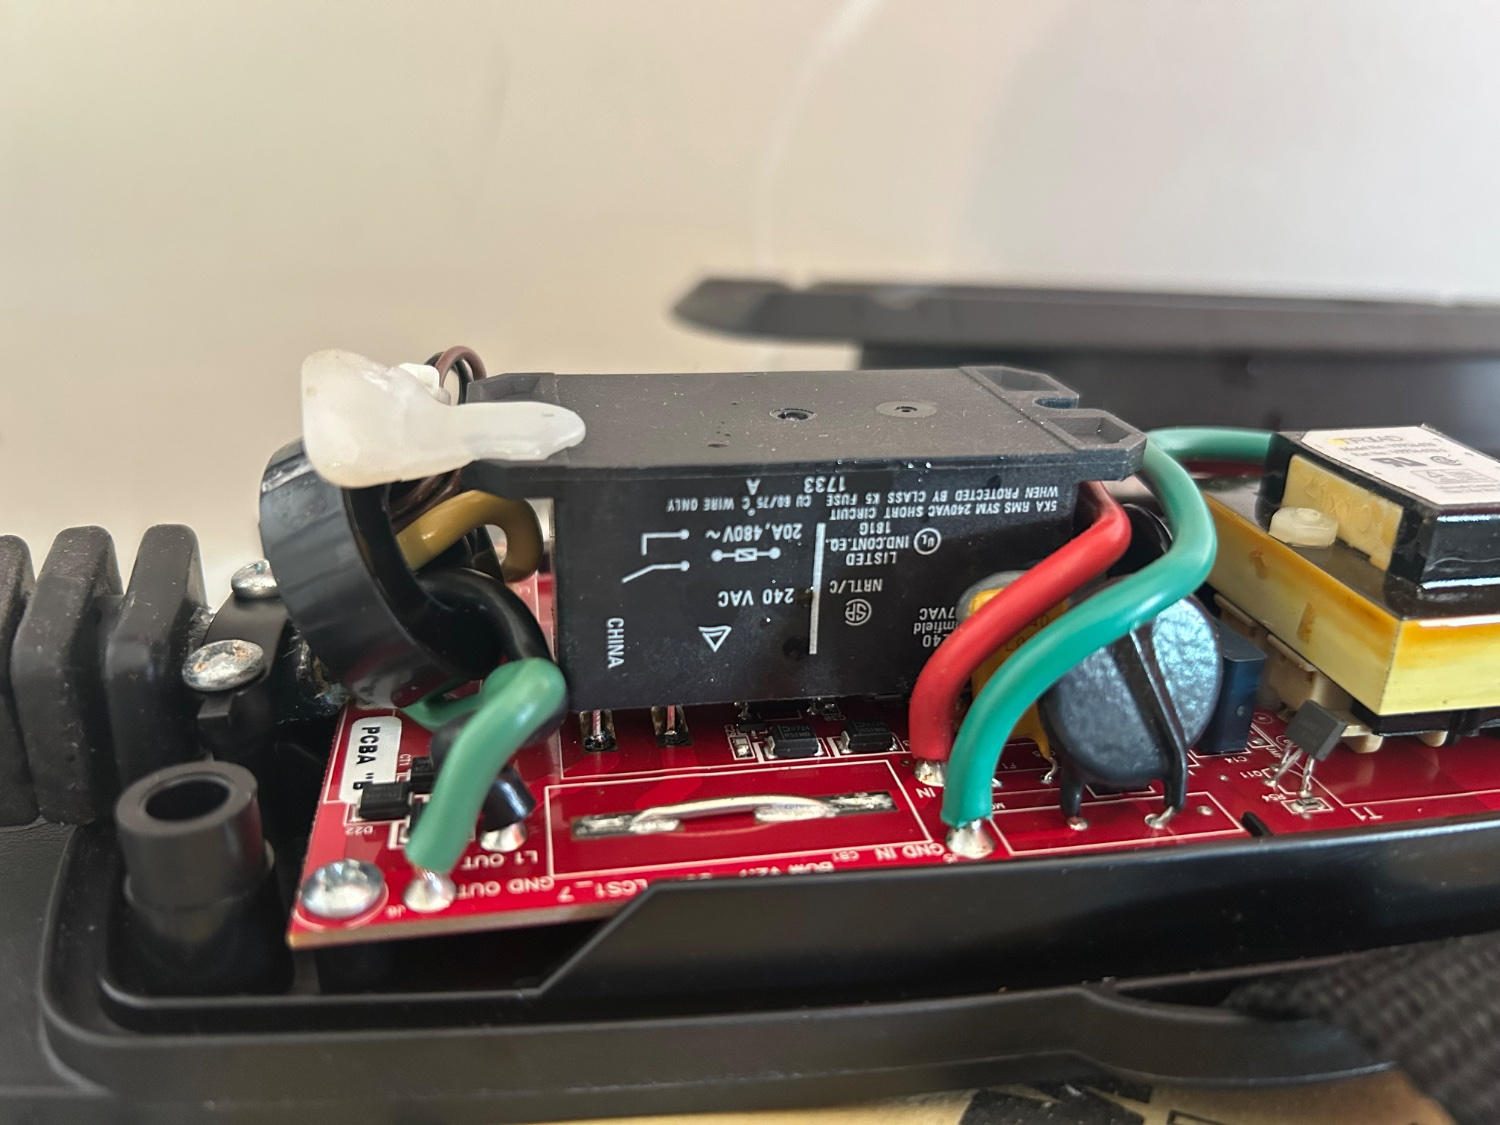
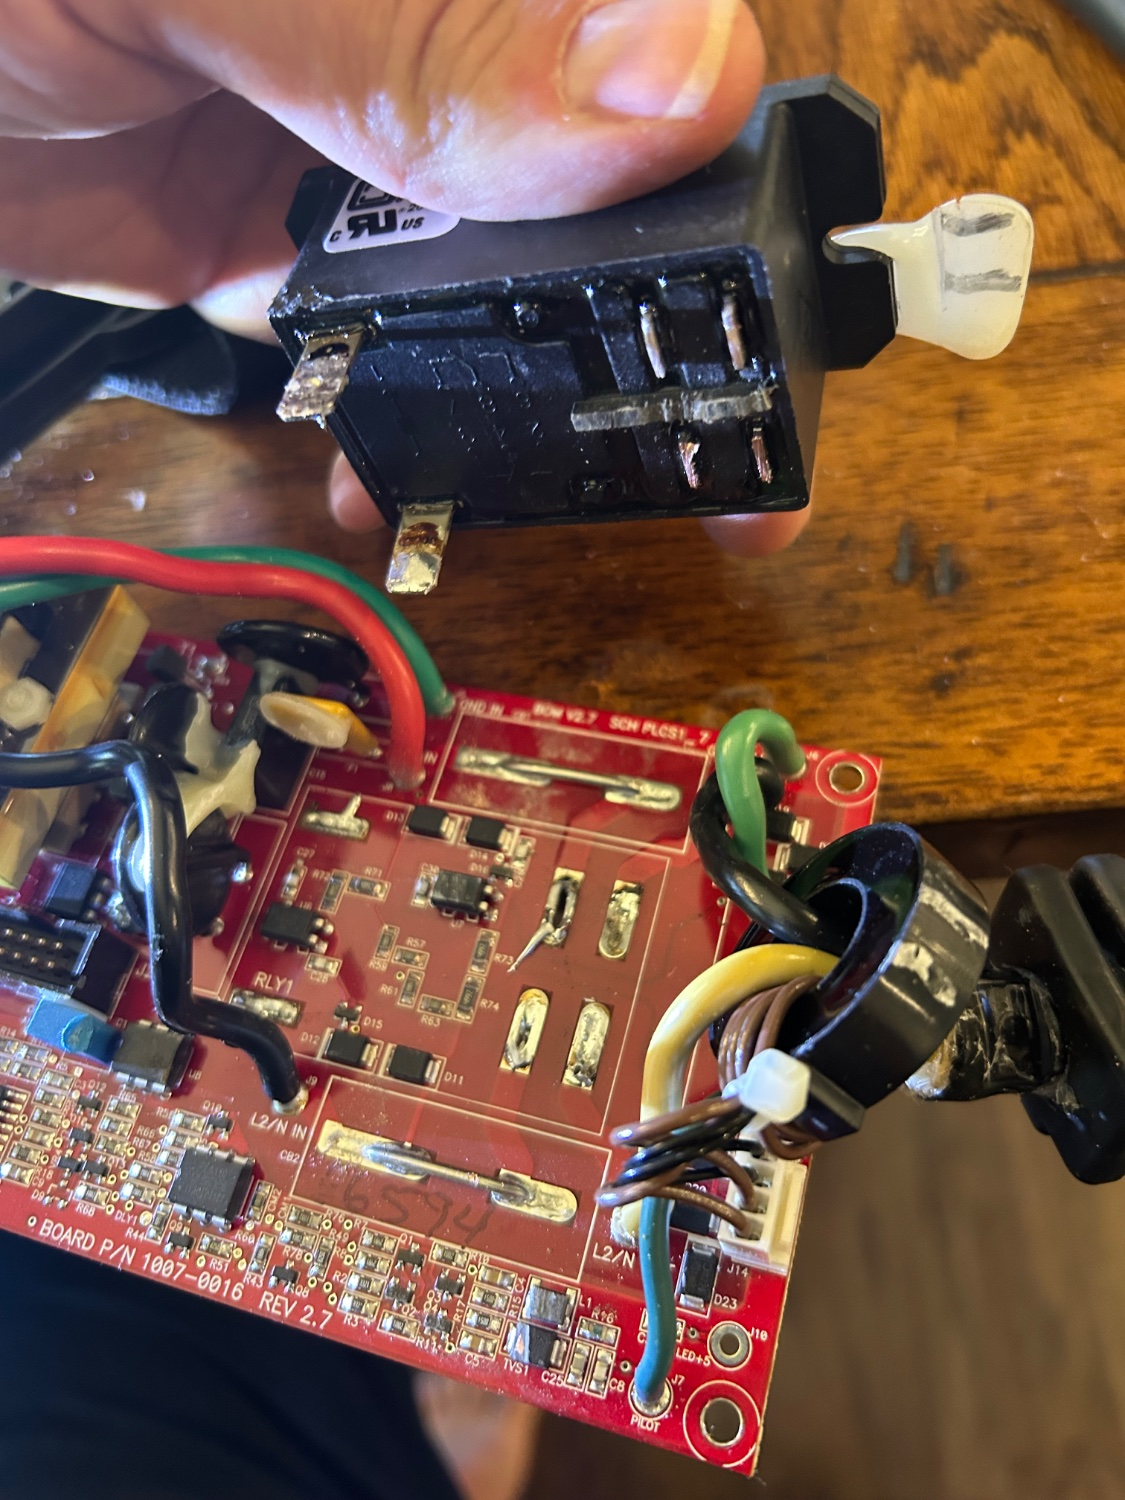
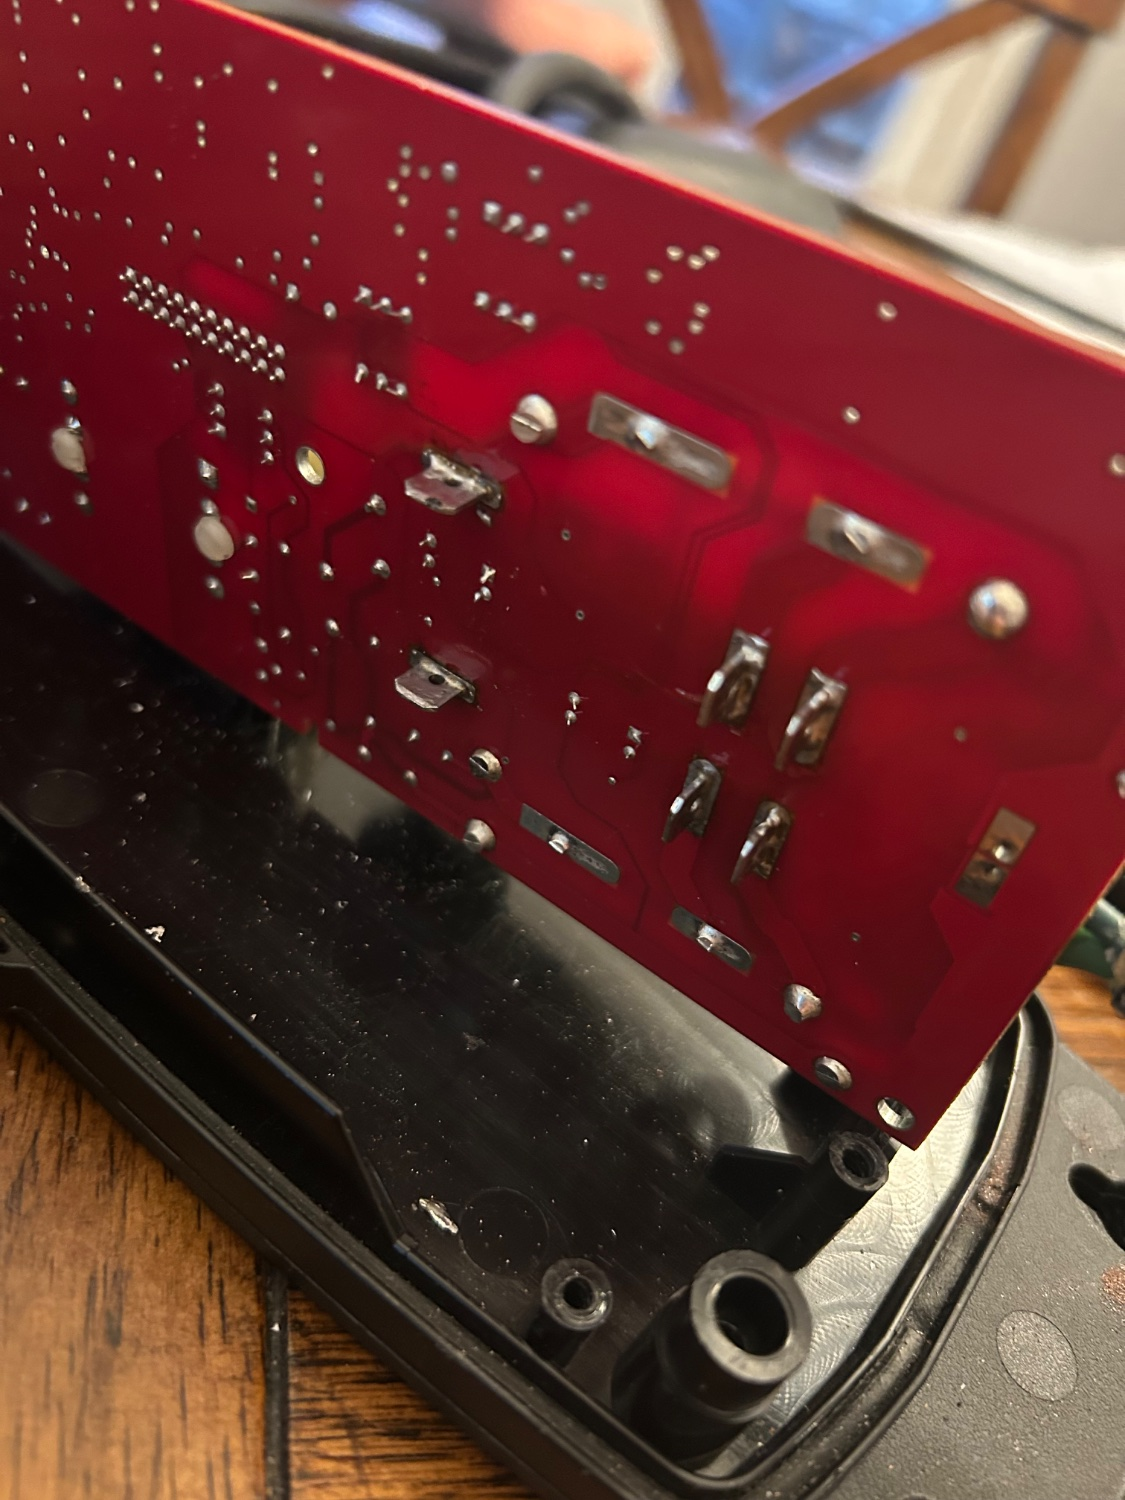
I opened it up and found that the big problem with doing this is that the relay has 6 large contact studs that are all soldered into the circuit board. I can only heat one up with a soldering iron at a time, and the one cannot pull out because the other five are still holding the relay onto the board.
So, I got a hacksaw blade and slid it behind the relay and cut off each leg one by one. You have to be very careful doing this to avoid cutting anything else, but I did get them all cut off without much damage to any of the other circuitry. After that I can melt the solder and remove each stud one by one.
I bought the exact brand/model relay for $40 off Amazon. Probably could have got it cheaper elsewhere if I was willing to wait.
The next problem is that all those holes in the circuit board are full of solder that block the new relay from going in. I found that there is such a thing as “desoldering wick” which I used to absorb the melted solder out one by one. Then the new relay could be inserted and the six studs soldered in one by one.
And it works!
-
cross-posted from: https://lemmus.org/post/26133267
Be careful if you attempt this, you’re working with 240v electronics.
A few months ago I noticed my EVSE started buzzing really loudly every time I would plug in to charge. A few days after that it stopped charging entirely. It’s a Clippercreek, that is 8+ years old, I can’t complain too much but I can’t exactly afford $300-ish for a replacement, so I decided to try to replace the relay myself.
I opened it up and found that the big problem with doing this is that the relay has 6 large contact studs that are all soldered into the circuit board. I can only heat one up with a soldering iron at a time, and the one cannot pull out because the other five are still holding the relay onto the board.
So, I got a hacksaw blade and slid it behind the relay and cut off each leg one by one. You have to be very careful doing this to avoid cutting anything else, but I did get them all cut off without much damage to any of the other circuitry. After that I can melt the solder and remove each stud one by one.
I bought the exact brand/model relay for $40 off Amazon. Probably could have got it cheaper elsewhere if I was willing to wait.
The next problem is that all those holes in the circuit board are full of solder that block the new relay from going in. I found that there is such a thing as “desoldering wick” which I used to absorb the melted solder out one by one. Then the new relay could be inserted and the six studs soldered in one by one.
And it works!
Nicely done! Clippercreek chargers have a really good reputation, but I suppose even after 8 years some repair may be expected.
If you expect to have this need in the future, I'd also recommend getting a cheap solder sucker desoldering tool. Like this one:

They cost about $5. Where you used solder wick, you'd use this first and get most if not all of the old solder out of the holes. You may have to do a final cleanup with solder wick, but it means you don't consume nearly as much of it.
Nice save your vehicle charger!
Hello! It looks like you're interested in this conversation, but you don't have an account yet.
Getting fed up of having to scroll through the same posts each visit? When you register for an account, you'll always come back to exactly where you were before, and choose to be notified of new replies (either via email, or push notification). You'll also be able to save bookmarks and upvote posts to show your appreciation to other community members.
With your input, this post could be even better 💗
Register Login